Tuesday, September 30, 2014

9/30/2014 Monday Night Homework: No Hard Edges


Looking at a photo, and, even more, looking at a live scene, it's usually easy to tell where everything is in the space that is visible. Alas, this is not always the case once the scene has been translated into a painting. Many of the clues that are present in the source of the painting are lost in translation, often including some of the most essential ones.

In the market scene, above, the variation in size and the overlap of the figures make it pretty easy to tell who is closer than whom. But, if I tried to paint the scene just the way it appears in the photo, I am sure the space would become confusing. Consider the figure near the center of the picture, for example, the one about halfway down the block, with black pants and a light blue shirt. In the painting it's quite possible that with her high contrast clothes and fairly sharp focus, she'd float right to the foreground and end up looking like a little puppet, hovering between the two large figures in front. If I painted her with soft edges, however, she'd take her proper place, fifty feet away.

Now try closing one eye and looking at all those colored tarps. Do they start to seem like they're all in the same plane? In fact, they are all in the picture plane, but we hope to create a convincing illusion of space. Once again, some soft edges would be a big help. How do we decide how many, and which edges to make soft?
What if you made a quick study that had only soft edges, no hard edges at all? You would then have a basis for discovering where you wish you had a sharper focus. You could pretend you had a ration of three hard edges, and consider where they would have the most impact, and then proceed to add more, one at a time.

To give this a try, you'll need to soak your paper for a few minutes. Put a 1/4 sheet in the sink or tub, in cool, not hot water. While it's soaking, wet the board or table where you plan to place the paper for painting. Now lift the sheet out of the water, in  and let it drip a while. Then flatten it onto the wet surface. It will stay wet much longer than if you had just wet one side with a brush, but not forever, so move right along. Block in the major shapes with a layer of their palest color. The water that is already on the paper is enough for the whole job, so keep the brush pretty dry. Adding more water will make puddles on the page, inviting the shapes to wander too much.

As you move on to the middle value shapes the paint on your brush can be thicker than the first layer. When you get to the darks, it can be even thicker. Remember, as soon as the brush touches the wet paper you are adding the water that is already there to the brush. If you see a hard edge, stop painting.
You can dry the paper thoroughly and re-wet the area you want to work on with a single stroke of a large brush. Going back and forth when re-wetting will loosen the earlier layers and make a mess.

Please bring in all your experiments.


Thursday, September 25, 2014

Tuesday Afternoon Homework 9/25/14 Warm and Cool


Warm/Cool

        
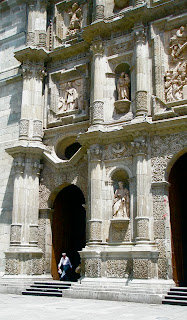
Oaxaca A.M.
Here's an exercise for exploring the concepts we've touched on regarding  warm/cool.

Limit your palette to just 2 colors, one distinctly warm (yellow, ochre, gold, rich green gold, cadmium red light, pyrol orange, quin burnt orange...), the other very cool (any blue, violet, perylene green, hunter green, pthalo green...).

Make a version of a picture in which for every shape you decide how warm or cool it should be. The pure form of your warm color would be reserved for the very warmest part of the scene, and the purest form of the cool would only be used for the coolest part. Everything else would involve mixtures of the warm and cool colors. The second warmest shape, for example, would have a little bit of the cool mixed in. got it?


Sole
How you choose to make something warm or cool is a big category. At first it may seem arbitrary, but the more practice you have paying attention to it, the more your choices will be informed by patterns you've observed. To get started, look at the image you've chosen to see if there is any content that you automatically think of as either cool or warm. The sky, for example, should be pretty obvious, as would the ocean, or a bare light bulb or fire. You might ask, "What would be the warmest (or coolest) part of this scene"? Then you have something to compare everything else to. If you decided, for example, that a brick wall in sunlight was going to be very warm, then the shadow on the wall would be somewhat cooler. The shadow on a clump of foliage would be even cooler, since the foliage in sunlight is cooler than the brick in sunlight. It's all relative, just like value. When you are deciding where on the temperature scale to place a particular subject, try looking for something a little cooler and something a little warmer than the part you are about to paint. Just as with value, when you notice that this new part should be lighter than THAT, but darker than THIS. So, too, with temperature, it helps to locate your new bit between two parts you're already committed to.
These photos would work for this assignment, but it’s always good to use one of your own, or work from life.

For homework, come with me to Oaxaca this spring.

Please post your discoveries by leaving a comment.
Have fun
Tom

Monday Night Homework 9/25/14 Creating Confidence


Whenever you take on a new scene or image as a painting subject, it's a very good idea to consider what might pose a problem for you. Wherever you are in your skill development, you can tell in your gut what will translate gracefully and what will require some practice. The hard part is remembering to take a little time to assess your readiness.


In this picture, for example, I can foresee some trouble getting the mass of green that surrounds the sheep to be a smooth, clean wash. With all the care I might choose to take painting around the sheep I could end up with streaky, overlapping brushstrokes. This is the kind of problem I could easily overlook, though, since the grass is not the real subject of the scene. My attention goes right to the sheep, so I'd probably consider how to paint them first. If I feel confident about translating them into layers, I'd think, "OK, I'm ready to paint". Then, when I got to the grass, I'd discover too late that I was not as confident about that part.
Five minutes is plenty of time to devote to an honest assessment of what may be tricky for you, and to devise a study that will give you the answers and the practice that you need. If you are concerned about  undoing your precious spontaneity, you needn't be. A little practice will not turn the process into a dry, cerebral activity.  As soon as you make a stroke on a new sheet of paper the juices will start to flow. The only difference is that you'll be more confident, and won't have to shift gears for the tricky bit.
By the way, if you paint this picture, consider moving that fence post.

Here are a couple of images to think about.


 The "unanswered question" is whatever looks tricky or puzzling about the image or scene you are about to paint. When you assess your readiness to put paint on paper, you are usually confident about some aspects of the scene and uncertain about others. A study that addresses a particular issue is a way to translate the tricky part into the language of watercolor. Sometimes there are several issues, but it's a good idea to devise a study for just one question at a time. In the example of the sheep in the meadow, the unanswered question is, "how can I paint the meadow as a fluid, continuous wash and still paint around the sheep?" It would probably not be necessary to paint the whole picture to answer this. It seems to be a wetness issue, so practicing painting around a shape with varying degrees of wetness on the paper and brush would reveal a good approach.
The homework is mostly about the task of identifying the nature of the unanswered question. Is it about value, color, wetness or composition? Once you decide, you can isolate that variable to find your answer most efficiently. So far, in class, we've looked mostly at wetness, or edge quality as a variable. If you decided that your question was about value, perhaps a monochrome value study would provide the information you need. If you were wondering where in the sequence of layers you needed to make sure the content was identifiable, it would be useful to make a quick version of just the strong darks in the scene, to find out how much of the story they tell. As the course progresses we will make this kind of assessment many times.
Please be prepared to tell the group what your unanswered question was, and how you attempted to answer it. If you have time to paint the picture, so much the better. Bring that, too.


Intermediate Watercolor 9/25/14


When you can look at a scene and see it as a series of layers made of washes and strokes, there is information there that might tell you when you need to be careful and when you can be carefree.


In this scene, for example, the small adobe building in the background has a dark line all across its top. That outline gives definition to the shape, establishing an edge that would show a viewer exactly where the top of the building is, even if the first layer had been painted very casually. Now look at the bottom of that same building. See how the dark shadow in the street defines half of the bottom edge of the building? And there's another shadow in the lower left corner that neatly establishes the rest of the border of the rectangle. These dark shapes that surround the basic form of the little building would make its presence very clear no matter how far "outside the lines" the initial layer had been painted. Even if it had bled into the sky with a soft edge, the darks would pull it together. Seeing this in advance would allow you to be quite carefree in the early stages of a painting.
"Why does that matter?", you may ask.
The less careful you need to be, the more attention you can devote to laying down gorgeous, juicy paint. When your brushwork is constrained by a narrow idea of  "getting it right", the strokes tend to be dry and tight. Why put unnecessary limits on yourself?
Look again at the scene. Do you see any other opportunities to paint loosely? Look for outlines and edges of shapes that would give final definition to earlier layers. There are enough late stage lines and shapes in this image to dramatically widen the range of what will work in the first couple of layers.


With the color removed and the contrast exaggerated, it's easier to see the role the darks play in defining the edges of the shapes in the scene. If you imagine superimposing these distinct darks onto a playful underpainting of lights and middle values, it becomes clear when in the sequence you would need to get it right.

Rex Brandt                        Last Light

Notice the first layer, under the shadow shapes in this painting.

Here are a couple more images that leave the careful part for late in the process. See how much of the control you can let go of. Have faith. Take big chances. 


The top edges of every shape in this scene are given most of their final definition by the last layer of strokes.


Here the middle value shapes require more care than the lights, though they are still quite simple. The darks look like they would clarify any sloppiness very well.

Beginning Watercolor: Monochrome value study 9/25/14

Please read this slowly before you start painting.


In the image above, which is darker, the door of the shack or the shadow on the bow of the boat? Where does the sunlit grass fall in the range of dark to light? It can be difficult to tell, especially with color complicating the task. A value scale would make this much easier. Here's how to make a rough but effective version:
Cut a piece of watercolor paper about 8 x 3 inches. With pencil, divide the paper into 10 strips that run across the narrow dimension.
Leave the bottom strip white, and paint the rest of the paper very light gray. Dry the paper.
Leave the strip next to the white one light gray and paint the rest of the paper a little darker.
Continue making layers and leaving consecutive strips until your last layer is a single black strip at the top. Ideally, each step on your scale would be an equal size jump from the previous one, but the scale will still work just fine even if your steps vary in how much they change.


Now use the scale to measure the value of the door, the shadow on the bow, and the grass. Which one is darkest?

For homework, find an image that resolves into just a few major shapes - fewer than 12, let's say. You can use the Cape Cod scene, above, or this one, below, or one of your own.


Make a monochrome value study that deliberately over-simplifies the image. Just shapes, for example, no texture. 
The following is a fairly long excerpt from my book. It describes a process for making a five value (white, light gray, middle gray, dark gray and black) study in monochrome. It may be that the image you select can be nicely simplified down to only three values; white, middle and black. Your first job is to decide which is the appropriate treatment.
Remember, please, that the whole study should take no more than 20 minutes. If it takes longer, you are probably trying to hard to make it a handsome product. It's supposed to be kind of dumb. If it's too simple, it will tell you where you need more subtlety. Don't use the same image I used to illustrate the process.

What role does value play in the relationships between the big shapes?
As a first treatment of a new subject, it would be hard to find a better exercise than a value study. Understanding the dark/light relationships between the big shapes in your composition is an essential step to making a painting that is cohesive. A five-value version  (white, light grey, middle grey, dark grey, black) can be done quite quickly over a simple drawing of the big shapes. It also provides good practice for seeing in layers. 
Look for an image that resolves nicely into just a few shapes - no more than a dozen. You can use the one you brought home from class, or one of your own. Choose a color (just one) straight from the tube, that can get dark enough to represent black. It’s better not to make a color by mixing, since that introduces another variable. This exercise is designed to focus on value only. Similarly, all paint should be applied to dry paper, to keep wetness from distracting your attention from value.
If you are tempted to get fussy about edge quality, or texture, or any kind of detail, remember, this is NOT A PAINTING, and it is supposed to be too simple. A door may be important, but the doorknob probably isn’t. I have seen some so-called value studies that are, in fact, very carefully observed monochrome paintings. They may be quite beautiful, but as tools designed to reveal the essential elements of the scene, they are not very useful. The best way to find out if something needs to be in the picture is to leave it out.
After each step, while you’re waiting for the paper to dry, assess how complete the illusion of light and space and substance feels.


Light is an important component of this image. Isolating the variable of Valueshould reveal the role it plays in creating the illusion of sun and shadow.


In your drawing of the big shapes, try to keep the number down to ten, or fewer. The profile of each shape is all you need to draw. The idea is tolocate the shapes, not to describe them.

               
· Starting with the light grey, paint the entire page, except for any shapes that need to stay white.
Is there a feeling of light in the study? What about space? Substance?

                   
· When that layer is dry, paint the whole page middle grey, except for the lights and the whites. If you can’t decide whether a shape should be light or middle, round it off one way or the other. The finished study will reveal whether you made the right choice.
Again assess the state of the illusion: Light? Space? Substance?


· When layer two is dry, apply the dark grey over everything except the middle, light and white shapes. Now that the background figure has a dark grey layer, and the section of wall behind him does not, notice how effectively the two separate, compared to the previous stage.

                
Finally, paint in the darkest darks.
The role of the darkest darks in creating an illusion of light, space and substance is clear even in a radically over-simplified image.

Where do I need more subtlety or specificity?
When the value study is finished, it can be compared to the source image or the scene to see where adjustments need to be made. Having come way over into the realm of too little information, we now have a basis for judging how much more needs to be included.  Don’t skip this step.  A study, as the name implies, is a learning tool. Your painting process will be more efficient and your paintings more cohesive if you extract all the lessons you can from your preliminary work.
In the photo, the two mounds of dirt are so similar in color and value it seemed sensible to treat them as a single shape. But the study reveals that it would be better to separate them, making it clearer that the one on the right is in front. It is also clear that the mound on the left does not separate sufficiently from the wall in the background. It looks ok where there is a shadow behind it, but where the wall is sunlit only the pencil line separates the two shapes. Perhaps lightening the left mound a little could solve both of these problems. Five values, in this case, are not quite enough. This is an example of the need for more subtlety.
The little raised frame beside the doorway that catches the sun is a fine feature  of the photo that I miss. It does an important job, describing the light. It is a bit of specific information that will add significantly to the picture without becoming a distraction.
It is surprisingly easy to see what is missing and what needs to be changed when the image has been over-simplified. If I had made a complex first attempt it would be difficult to know which of the (too) many elements were not necessary.


Thursday, September 18, 2014

Sept. 16 Tuesday afternoon: Save those lights!


Remember the fringe of backlit chestnut leaves along the bottom of the big tree? Of course you do. I think everyone of us saw what happens if you don't give adequate emphasis to the parts of a scene that describe the light. 
Paint is not light. It is bounded on both ends of the value scale by inherent limitations. We cannot make any part of a watercolor brighter than the white paper, and we usually don't want to apply darks so thickly that they remain shiny after they dry. 
There are often specific places, like the fringe of glowing leaves, where we must take care to reserve the lightest lights. Sometimes we also need to exaggerate the difference between those extreme lights and darks and what is immediately adjacent to them. 


The horse's crest is brilliantly lit partly because it is surrounded by strong darks. If you failed to reserve the sliver of pure light the painting simply would not contain the same quality of illumination.


I know you know where the essential bits of light are in this scene. Once they're covered up, they're gone for good, so we have no choice but to be careful right from the start to reserve them. Draw them, mask them, whatever it takes. Just don't let them get away!

Sept. 17 Beginning Watercolor Homework: Wet into wet

To be accurate, it would probably be better to call this kind of painting, "damp into wet", since it is usually important to keep the brush somewhat drier than the paper. The nomenclature of watercolor is often confusing. "Drybrush", for example, refers to working with just a little water on the brush. As far as I can tell, it is not possible to paint with a dry brush. I've never liked the term, "dropping in" some color, which, if taken literally, would mean the brush never touches the paper. And don't get me started on "capturing" a subject. I wince every time I hear that one.
But, back to the homework.
I think everyone took home a photo yesterday, but I'll insert a couple more here for reference.


The sky in the image above looks all soft-edged to me. I'd start by wetting the paper. That first wetting, remember, should be wet enough to provide all the water for the ensuing layers. Guess who's in charge of this. I'd quickly follow with a pale yellow-orange wash along the bottom of the sky. Then I'd add pigment to the brush (without rinsing it off first) to make the light gray clouds I see near the horizon. Finally, I'd add more pigment to the brush to make all the darker clouds. 

Take a look at the ground in this photo. Would that be a candidate for a wet into wet treatment? Try it, if you're interested. It may be that this is suited to a wet on wet treatment only part way through the sequence of layers, after which some hard edges may be required.

This is an exercise, meant to encourage practicing technique. The goal is to gain some confidence about producing the kind of edges you want. The goal is not to produce a handsome painting. The pressure that usually comes along with that goal is liable to constrain your brushwork, and tempt you to correct whatever isn't accurate. The more you do either of those, the less likely you are to make a natural looking interpretation. A couple of scraps of paper with patches of sky or sagebrush would be more appropriate than something ready to frame.


How many layers do you see, moving from light to dark, in the water? Would you wet the paper first or leave it dry? Not sure? Try it one way or the other. The study will reveal the answer. If your choice was  not ideal, don't fix the study. Make another one, instead. And bring them both to class!

Wednesday, September 17, 2014

September 17 Intermediate Homework: When in the sequence of layers does your subject become defined?

Sometimes one look at an image reveals where in the sequence of layers the viewer begins to recognize the subject matter. Look at this scene from Lopez Island, for example:


You could take pains to render the shapes accurately right from the palest first layer, but you wouldn't have to. The darks in this scene are so descriptive they could stand alone, which means that the lights and middle values could be painted very loosely. I believe I heard a few people say they wanted to loosen up. Here's a good opportunity.


Lopez, again. It is not as obvious, perhaps, but here, too, most of the definition occurs relatively late in the process. Take a look at the hill at the bottom of the drive, for example. Imagine that the yellow of the poplars, applied very early in the sequence, bled into the green field, and all over the hill and the line of firs on the left. Could you still confine it to the tidy row it belongs in?

Another way of looking at the scene that can clarify where you need to be careful is to identify what the important part is to you. For me, it's the right angle relationship between the trees and the shadows. With that noted, I am confident I can interpret it satisfactorily no matter how casual I've been in preceding layers.

Monday Night, September 16th, 2014: Sky Practice

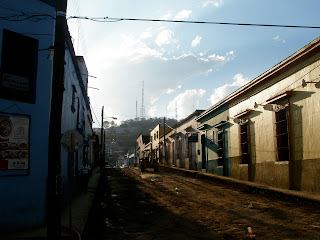
Here are some sky photos to consider as painting subjects. What kind of edges do you see? Would you want to work on dry paper or wet? How many layers would it take to realize the range of values you see?
Choose one of these, or go outside and paint the sky, or invent a skyscape. find a range of strokes and washes that will be acceptable to you before you put paint to paper, so that you are not searching with your brush. The more you adjust and correct your statement, the less it will look like a natural sky.